
Art instructor Will Kemp offers lessons for the absolute beginner in this 4-part video series on acrylic landscape painting techniques. Kemp says.....when we combine the principles from classical painting with the new modern materials of acrylic painting...we can...create a method of painting that is both simple for the beginner to create pleasing results and broad enough for more practiced artists to continue their study."
Kemp gives us a little history and remarks that:
"The Old masters had it easy. Painting was seen as a craft, you had an apprenticeship or trained in an Atelier workshop. Colour choice was limited, the vivid bright colours that are found in acrylics today just weren’t available and pigment choice paid an integral part in the painting process. Not just aesthetically but as a sign of power."
"Often, the more blue in a painting, the richer the patron. The pigment Ultramarine Blue famously used to be more expensive than gold. It was extracted from lapis lazuli, a semi precious stone, that was used as the raw ingredient until the colourmaker Jean-Baptiste Guimet created a synthetic alternative to lapis lazuli in France in 1828. This is why it is often referred to now as French Ultramarine."
These days choosing paints to start with can be a tough choice. There are literally thousands of choices. Paint manufactures are constantly producing new colors and new pigments.
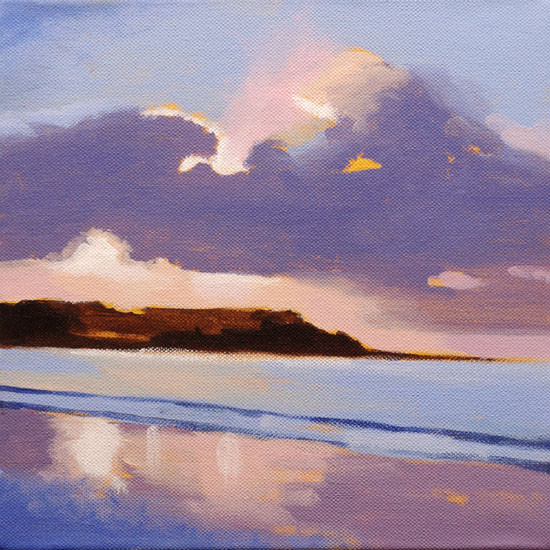
For this seaside sunset painting, you'll need a limited palette of acrylic paints in Titanium White, Burnt Umber, Ultramarine Blue, Cadmium Yellow Light and Permanent Alizarin Crimson plus Yellow Ochre for the underpainting. You'll also need a 10x10 inch pre-primed canvas, a size 6 Filbert and size 10 Round brush.
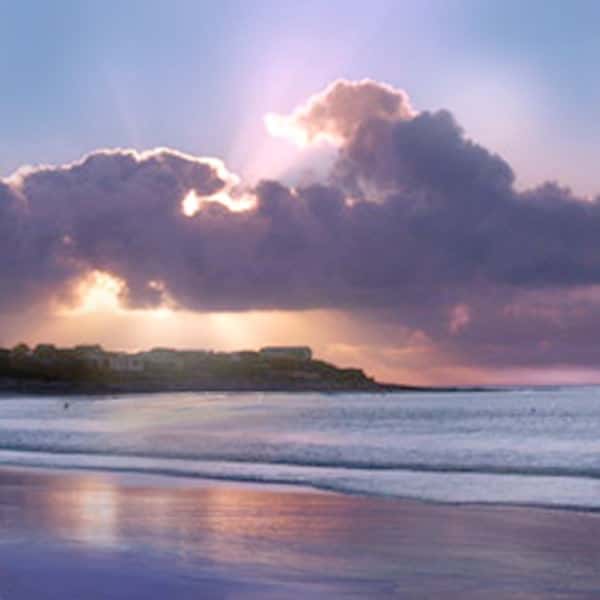
The photo below can be downloaded and printed out to use as a painting guide.
There are 3 simple steps to begin:
Step 1. Apply a colored ground (underpainting) of Yellow Ochre. Refer to How to Apply a Colored Ground if you haven't watched that video previously.
Step 2. Sketch out the image directly on canvas. There's no need for detail. It is just a guide to get you started. Mark a level horizon, the position of the cliff and a few clouds.
Step 3. Establish the darkest darks and lightest lights as shown in the beginning of the video.
The following 4 videos will take you from beginning to completion of this acrylic sunset painting.
"Often, the more blue in a painting, the richer the patron. The pigment Ultramarine Blue famously used to be more expensive than gold. It was extracted from lapis lazuli, a semi precious stone, that was used as the raw ingredient until the colourmaker Jean-Baptiste Guimet created a synthetic alternative to lapis lazuli in France in 1828. This is why it is often referred to now as French Ultramarine."
These days choosing paints to start with can be a tough choice. There are literally thousands of choices. Paint manufactures are constantly producing new colors and new pigments.
For this seaside sunset painting, you'll need a limited palette of acrylic paints in Titanium White, Burnt Umber, Ultramarine Blue, Cadmium Yellow Light and Permanent Alizarin Crimson plus Yellow Ochre for the underpainting. You'll also need a 10x10 inch pre-primed canvas, a size 6 Filbert and size 10 Round brush.
The photo below can be downloaded and printed out to use as a painting guide.
There are 3 simple steps to begin:
Step 1. Apply a colored ground (underpainting) of Yellow Ochre. Refer to How to Apply a Colored Ground if you haven't watched that video previously.
Step 2. Sketch out the image directly on canvas. There's no need for detail. It is just a guide to get you started. Mark a level horizon, the position of the cliff and a few clouds.
Step 3. Establish the darkest darks and lightest lights as shown in the beginning of the video.
Beautifully demonstrated. Thank you so much :-)
ReplyDeleteBeautifully demonstrated.Thank you :-)
ReplyDeleteHi thanks for pposting this
ReplyDeleteI find the historical context about paint pigments fascinating.
ReplyDelete